Perfectly routed glue joints are extremely strong and allow easy self-centering glue-ups.
The Reverse Glue Joint Router bit is one of those router bits that look attractive and easy to set up.
In practice, though, its set-up can be frustrating, and for many woodworkers this router bit has become another one in their collection of most expensive router bits: the ones that remain forever unused.
Unless the set-up is perfect, the joint will show ugly ridges on both sides that need to be planed or sanded off. This requires additional work and of course reduces the thickness of the work piece.
With the help of the GrooveCenter and a couple of small auxiliary parts, Reverse Glue Joint Bits can be set up in no time for perfect results.
As with all GrooveCenter operations, this procedure does not require any measuring, maths or calculations.
It can be executed in minutes for a perfect joint.
Please note that the Platform is router bit / brand specific. It is currently available for Reverse Glue Joint bits from the major manufacturers. Before ordering your Platform, please email us the brand and part number of your Reverse Glue Joint bit so that we can check and confirm availability.
 |
For this sequence two small auxiliary parts are necessary: -the Collet Axis Pin: This is a brass pin with a ½” diameter. The upper part is cut back to 1/4”, so that the flat face is located exactly flush with the axis of the router arbor when chucked into the router collet. -the Reverse Glue Joint Platform: Shaped to fit around the Router Bit and with router bit specific dimensions. |
 |
We will be using the Sommerfeld #01008 Reverse Glue Joint Bit. This is identical to the CMT #855.501. |
 |
With the work piece in the GrooveCenter’s Carriage, its Collet Pin is dropped into the router collet. The fence is positioned against the Fence Pin. This fence position is not final, it’s used for the next step only. |
 |
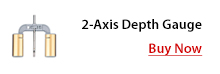
With the fence in position, the Collet Axis Pin is chucked into the router. The 2-Axis Depth Gauge registers the distance to the fence. Without disturbing the depth setting, the 2-Axis Depth Gauge is set aside carefully. |
 |
Now the Reverse Glue Joint Bit is chucked into the router. The fence insert with narrow slot (necessary for proper contact of the GrooveCenter’s fence pin) is exchanged for one with enough space for this large bit. |
 |
The Platform is placed next to the bit.This platform is router brand / size specific and made for that router bit only. |
 |
The router bit height is adjusted until its top touches the Depth Gauge’s pin. |
 |
Now the fence can be moved to its definite position: flush with the vertical cutter edge.The mating parts are routed face up and face down respectively. |
 |
Suspense–does this out-of-focus photo hide success? |
 |
Yes, the joint is perfect! |
Related Articles