|
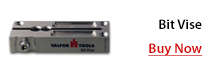
The Bit Vise works best when mounted on a flat, stable surface. It can be bolted down permanently, or fixed with appropriately sized screws, through the holes provided in the three corners. |
 |
Mounted near the edge of the work surface allows the hex key to be turned easily. |
 |
Once the Bit Vise is securely fastened, the router bit can be inserted into the appropriate hole. The left hole is 1/2″ diameter, the other 12mm. Use a reducer collet for smaller size shanks. With the supplied hex key, turn the bolt clockwise to tighten the jaws of the Bit Vise around the router bit’s shank just enough to avoid any slipping of the shank. |
 |
The nut can now be safely unscrewed with an appropriately sized wrench. |
 |
Small parts such as the nut, washers or any thin spacer rings can be stored in the two pockets carved out of the surface of the Bit Vise. It’s easy to lose track of the sequence in which the small parts are mounted (especially in between the cutters), so it’s a good idea to space them in the right order when taking the stack apart. |
 |
Cleaning the router Bit: To avoid overspray, punch a hole in the bottom of a cut-away plastic container and place the router bit through the hole into the Bit Vise. |
 |
The router bit can now be sprayed with cleaning agent and scrubbed with a brass-bristled brush without making a mess on the workbench, or – even worse – on the router table. Leaving the router bit loose allows turning it by hand for a complete cleaning. |